Use this page for installation help, pairing issues, playback bugs, notification problems, or anything else you hit while testing Pawse.ai.
Getting started
Use this as the short version for new beta testers. The goal is to get one dog profile created, one playback device ready, and one real session completed with feedback.
All five environments and all premium features are fully unlocked during the beta. There is nothing to purchase. Use everything.
Install via TestFlight
Download TestFlight first. It's a free Apple app. You need it installed before you can open the beta.
Once TestFlight is installed, open the correct link on each device:
TestFlight is tied to your Apple ID. Make sure you are signed in with the same Apple ID on every device where you want to run the app.
Apple TV: Install TestFlight on your Apple TV from the App Store first, then open the Apple TV link above on your iPhone or computer. If you accepted the invite on iPhone with the same Apple ID, the beta will also appear in TestFlight on your Apple TV automatically.
Keeping the app updated
You will receive an email when a new build is available. This comes from [email protected]. Add it to your contacts so it does not land in spam.
Updates are installed through the TestFlight app, not from the App Store. Open TestFlight, tap Pawse.ai, and tap Update. Do this on every device you use with the app.
Beta builds expire after 90 days. TestFlight will warn you before this happens. Updating to the latest build resets the timer.
Always test on the latest version. If you're reporting a bug, check the build number in Settings first to confirm you're not on an older build.
Before your first test
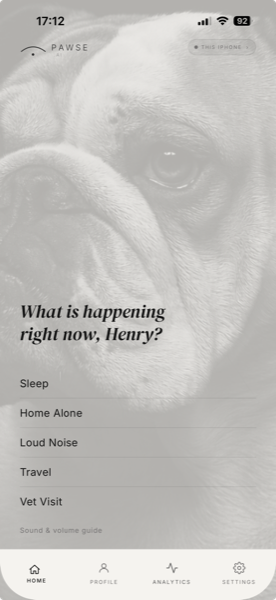
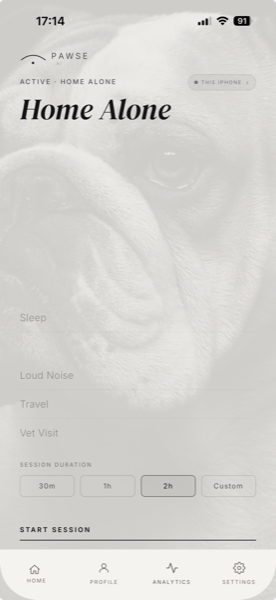
The home screen on iPhone
Start on iPhone. The iPhone is the controller. It holds your dog's profile, the session controls, and the feedback flow.
Create a dog profile. Add your dog's name, breed or mix, and age. The app uses this to personalise the sound engine from the first session.
Pick one real use case. Sleep, home alone, loud noise, travel, or vet and recovery. Testing one situation well is more useful than testing everything at once.
Keep the test environment simple. Use the room and speaker setup you would actually rely on at home.
Device setup
Pawse.ai beta works best as a controller and receiver system. Your iPhone starts the session. Your Apple TV or iPad can play the audio independently in the room with your dog.
Play on iPhone
Fastest way to test. No pairing is needed if you want to start with the iPhone speaker or a Bluetooth speaker connected to it.
Good for first checks. Use this to confirm the app launches, the session starts, and feedback records correctly before testing remote playback.
AirPlay also works from this mode. You can AirPlay to a HomePod, Sonos, Echo, or any AirPlay-compatible speaker directly from the iPhone. If you are AirPlaying to a Mac or laptop, go to Settings → Playback device and select Mac / Laptop first to avoid clipping.
Pair Apple TV
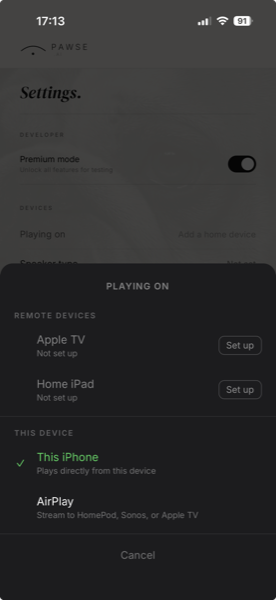
Playing On, iPhoneWhat you'll see on Apple TV
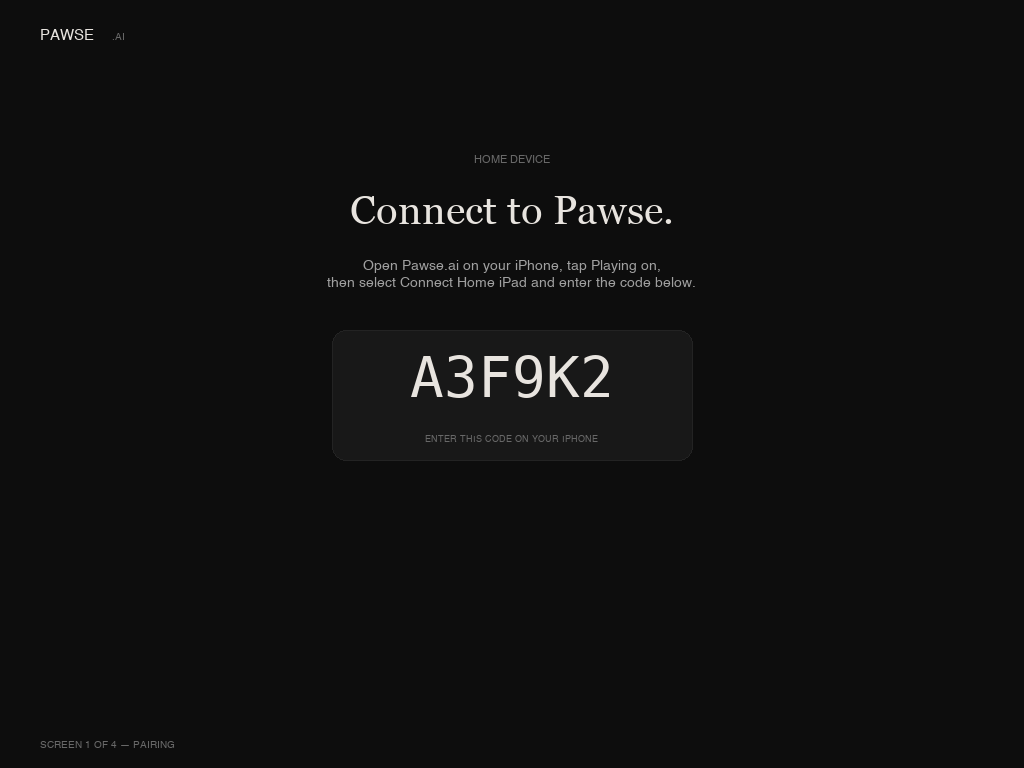
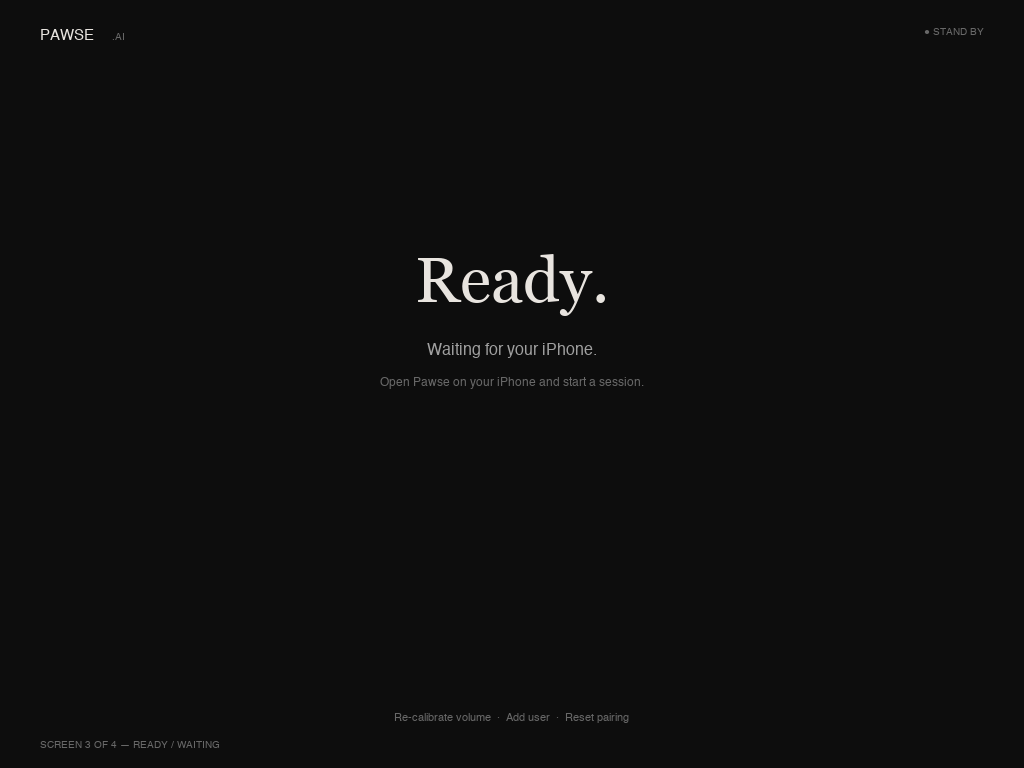
Open PAWSE on your Apple TV. The app opens directly to a pairing screen labelled HOME DEVICE showing a large 6-character code.
On your iPhone, open PAWSE and tap Playing on. Select Connect Apple TV and enter the code shown on the television.
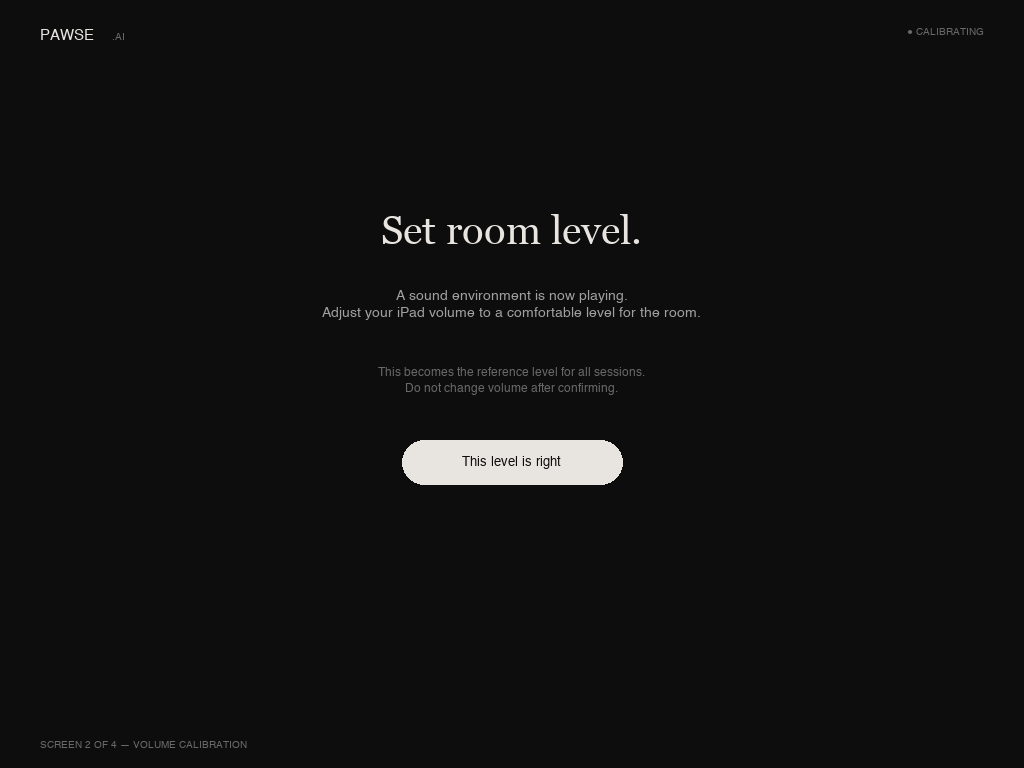
The Apple TV will then play a sound to set the room level. Adjust the TV volume to a comfortable level for the room and tap This level is right. This becomes the reference volume for all sessions. Do not change TV volume after confirming.
The Apple TV will show Ready and wait for sessions from your iPhone. You do not need to touch the TV again.
If the code has changed, tap Playing on in the iPhone app and select Connect Apple TV again. Enter the new code shown on screen.
Pair iPad
1. Pairing2. Set volume3. Ready
Open PAWSE on your iPad. The app opens directly to a pairing screen labelled HOME DEVICE showing a large 6-character code.
On your iPhone, open PAWSE and tap Playing on. Select Connect Home iPad and enter the code shown on the iPad.
The iPad will then play a sound to set the room level. Adjust the iPad volume to a comfortable level for the room and tap This level is right.
The iPad will show Ready and wait for sessions from your iPhone. Leave it in the room with your dog.
If the code has changed, tap Playing on in the iPhone app and select Connect Home iPad again. Enter the new code shown on screen.
Tip: If you only want a quick beta test, start with iPhone playback first. If that works, move on to Apple TV or iPad pairing.
Running a session
A session is only useful if your dog is actually in the state the mode is designed for. Wait for the real moment. Testing Sleep while your dog is mid-zoomies, or running Home Alone with you sitting next to the speaker, gives us nothing.
Minimum session length: 20 minutes. Anything shorter gives the audio no time to work and gives us no data worth keeping. Set a realistic duration before you start and step away.
Start the right mode
Select a modeSet duration and start
Sleep: Use it for rest onset or overnight settling.
Home Alone: Use it before leaving or during short absences.
Loud Noise: Use it for storms, fireworks, or sudden outside noise.
Travel: Use it during car or crate transport.
Vet & Recovery: Use it around stressful medical or recovery windows.
During playback
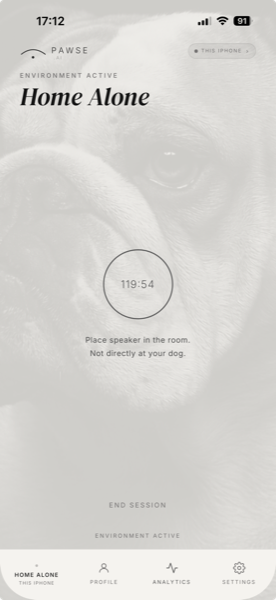
What you'll see during a session
Choose the output device in Playing On. Confirm where the session should run before tapping Play.
Keep the speaker at room distance, not right next to your dog. The audio is designed to fill a space, not play close to the ears.
Watch your dog during the session. The signals that matter: settling down, slower breathing, less pacing, fewer trips to the door, less startling. You will need these observations when you rate the session afterward.
For AirPlay, keep the iPhone active. For Apple TV or iPad receiver playback, the remote device continues the session independently and you can leave.
After the session
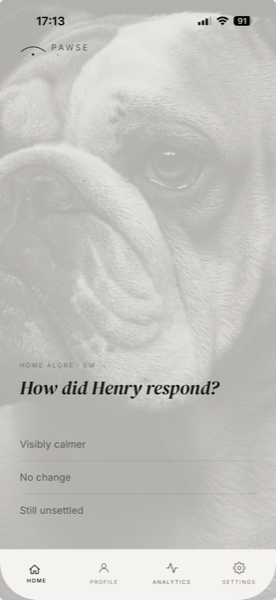
The feedback screen
Wait for the end notification. If you do not get one, check notification permissions for Pawse.ai on iPhone.
Rate every session. Calmer, not calmer, or neutral — that response is how the engine adapts for your dog specifically. Skipping it means nothing changes. It takes two taps.
Record what you actually observed. You watched your dog. Did they settle? Pant less? Stop pacing? That observation is more useful than a gut feeling. Add a note if anything stood out.
Test the same mode more than once. The engine learns across sessions, not from a single data point. Repeated testing in the same real context is where the data gets meaningful.
What to report
The best beta reports are specific. If something breaks or feels confusing, tell us exactly where it happened and what device you were using. You can send feedback directly from TestFlight. Open the TestFlight app, tap Pawse.ai, then tap Send Beta Feedback. Taking a screenshot while in the app will also prompt TestFlight to attach it automatically.
Most useful report details
Mode: Which environment you were testing.
Device path: iPhone only, iPhone + Apple TV, or iPhone + iPad.
App version: The version shown near the bottom of Settings.
Dog context: Breed or mix, and what was happening in the room.
Expected vs actual result: What you thought would happen and what actually happened instead.
Send us a beta report.
Fill in the form below and we'll get back to you. For faster help on common issues, check the list on the left first.
✓ Message sent. We'll reply to your email within 24 hours. You can also download the app directly from the download page.